
How to Remove Oxidation from Siding to Restore its Shine
Does your home look dull or chalky despite regular washing? You are likely dealing with oxidation, a chemical breakdown caused by constant exposure to sunlight, moisture, and environmental pollutants. While standard exterior siding cleaning removes surface dust, it often fails to address this stubborn, powdery layer that hides your home's true color.

Achieving effective shine restoration requires a specialized approach. We guide you through a precise process involving careful cleaning, chemical treatment, thorough rinsing, and protective sealing for vinyl, aluminum, or painted surfaces. This method ensures your home looks vibrant again without damaging the underlying material.
Some projects require a delicate touch to avoid permanent damage. If you find the process overwhelming or notice deep structural wear, our team in Northern Virginia is ready to assist.
Call (571) 426-8643 for Expert HelpKey Takeaways
- Oxidation is a chemical reaction, not just surface dirt.
- Standard soap and water will not fix chalky siding.
- Proper restoration involves cleaning, treating, and sealing.
- Protecting your siding after cleaning prevents future buildup.
- Professional help is recommended for complex or delicate surfaces.
Why Oxidation Dulls Siding and How to Identify It
Understanding why your home’s exterior loses its luster is the first step toward effective maintenance. Many homeowners assume that a dull appearance is simply the result of accumulated grime, but the reality is often a chemical change. Proper exterior siding cleaning requires us to recognize that this process is not just surface-level dirt.
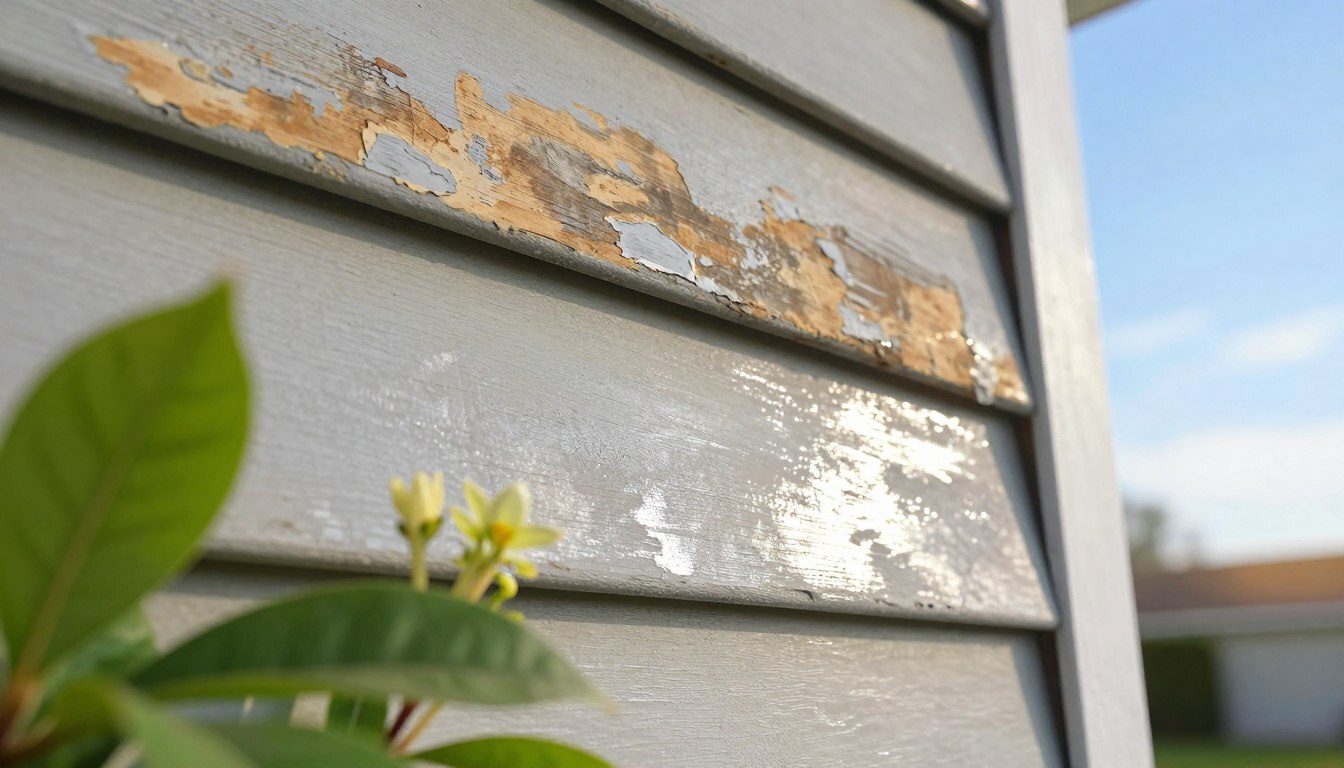
How oxidation forms on vinyl, aluminum, and painted siding
Oxidation occurs when ultraviolet radiation from the sun, combined with oxygen and moisture, breaks down the chemical bonds in your siding material. Over time, this reaction causes the pigments in vinyl or the protective coatings on aluminum to degrade. This process is a natural consequence of environmental exposure, making proactive oxidation prevention essential for long-term curb appeal.
Recognizing chalky residue, fading, and uneven discoloration
The most common sign of this chemical breakdown is a fine, powdery substance that rubs off on your hand when you touch the siding. You may also notice that the color appears significantly lighter or "washed out" compared to when the material was new. Often, this fading happens unevenly, with sides of the house facing direct sunlight showing more severe discoloration than shaded areas.
Distinguishing oxidation from mildew, algae, dirt, and paint failure
It is vital to identify the specific cause of your siding issues before you begin any treatment. While dirt and organic growth sit on top of the surface, oxidation is a degradation of the material itself. Use the following guide to help determine what is affecting your home:
| Condition | Visual Texture | Removal Method |
|---|---|---|
| Oxidation | Powdery, chalky film | Specialized oxidation remover |
| Mildew/Algae | Dark, fuzzy, or slimy spots | Biocide or mild detergent |
| Surface Dirt | Loose dust and grime | Water and soft brush |
| Paint Failure | Peeling, flaking, or bubbling | Scraping and repainting |
When oxidation indicates deeper siding deterioration
While surface oxidation is manageable, it can sometimes mask more serious structural problems. If you notice that your siding panels are brittle, cracked, or warped, the material may have reached the end of its lifespan. If you are unsure about the integrity of your exterior, please contact our team at (571) 426-8643 for a professional assessment.
How to Remove Oxidation from Siding to Restore its Shine
We believe that transparency is the foundation of any successful home maintenance project, especially when dealing with surface degradation. Understanding the limitations of your materials is the first step in learning how to remove oxidation from siding to restore its shine effectively.
Set realistic expectations for oxidation removal and shine restoration
It is important to recognize that while oxidation removal can significantly improve your home's curb appeal, it cannot always reverse years of sun damage. In some cases, the finish of the siding has physically broken down, meaning that no amount of cleaning will return it to its original factory luster.
"The goal of exterior maintenance is to preserve the integrity of the material while enhancing its aesthetic value, rather than expecting a brand-new finish on aged surfaces."
Understand the differences between light, moderate, and severe oxidation
Identifying the severity of the chalky buildup helps determine the best course of action. We have categorized these levels to help you assess your home's specific needs.
| Level | Visual Signs | Recommended Action |
|---|---|---|
| Light | Minor dullness, minimal chalking | Standard cleaning |
| Moderate | Visible white residue, uneven color | Specialized oxidation removal |
| Severe | Brittle panels, deep color loss | Professional siding restoration |
Choose between DIY siding cleaning and professional siding restoration
If you are dealing with light surface buildup, a DIY siding cleaning approach may be sufficient. However, moderate to severe cases often require specialized equipment and chemical knowledge to avoid damaging the underlying material.
When the finish is compromised, siding restoration becomes a more complex task. If you are unsure about the condition of your panels, our team is ready to assist you at (571) 426-8643 to ensure the job is done safely.
Protect adjacent windows, landscaping, trim, and exterior surfaces
The chemicals used for oxidation removal can be harsh on surrounding elements if not managed correctly. Before starting any DIY siding cleaning, you must shield your plants, windows, and delicate trim from runoff.
Taking the time to properly prep the area prevents accidental damage to your landscaping. Shine restoration should never come at the cost of your home's other exterior features, so always prioritize containment and protection.
Gather the Right Tools, Cleaners, and Protective Equipment
Before you start your exterior siding cleaning, you must assemble the proper tools to ensure a safe and effective process. Having the right equipment prevents unnecessary frustration and helps you achieve a professional finish. If you ever feel unsure about the process, our team is ready to assist you at (571) 426-8643.
Use soft brushes, microfiber cloths, buckets, and a garden hose
To protect your home's finish, stick to gentle cleaning implements. A soft-bristled brush is ideal for lifting away chalky residue without scratching the surface. Microfiber cloths are excellent for wiping down delicate areas or drying panels to prevent water spots.
Keep a few large buckets on hand for mixing your cleaning solution. A standard garden hose with a spray nozzle provides enough pressure to rinse away debris without forcing water into your home's structure.
Select a siding-safe oxidation remover for the siding material
Choosing the right chemical agent is vital for successful DIY siding cleaning. We recommend using products specifically formulated for your siding type, such as vinyl or aluminum.
"The quality of your cleaning agent determines the longevity of your home's curb appeal and the health of your exterior materials."
Always prioritize cleaners that are free of bleach and volatile organic compounds (VOCs). Bleach can often accelerate the oxidation process, leading to more significant fading over time.
Why abrasive pads, metal brushes, and harsh solvents can cause damage
It is tempting to use heavy-duty tools to speed up the work, but this often leads to permanent damage. Metal brushes and abrasive pads will strip away the protective factory finish of your siding. Once this layer is gone, the material becomes porous and attracts dirt much faster.
Harsh solvents can also cause chemical burns or discoloration on painted surfaces. Always avoid these aggressive methods to maintain the structural integrity of your panels.
Wear gloves, eye protection, nonslip footwear, and suitable work clothing
Your safety is just as important as the condition of your home. Always wear chemical-resistant gloves to protect your skin from cleaning solutions. Protective eyewear is essential to prevent splashes from reaching your eyes while you work.
Choose sturdy, nonslip footwear to maintain your balance on ladders or wet surfaces. Wearing long sleeves and pants will also shield you from accidental contact with cleaning agents, ensuring a safe and productive day of maintenance.
Test the Siding and Prepare the Work Area
We believe that thorough preparation is the secret to achieving professional results during your siding maintenance. Before you begin any project, it is vital to understand the specific needs of your home's exterior materials.
Read the siding manufacturer’s cleaning and maintenance guidance
Every manufacturer provides specific instructions regarding which chemicals are safe for their products. Ignoring these guidelines can lead to permanent discoloration or structural damage. Always check the official documentation to ensure your chosen methods align with the warranty requirements of your siding.
Inspect seams, caulk joints, fasteners, vents, and damaged panels
Before applying water or cleaners, we recommend a detailed walk-around of your home. Look closely at seams, caulk joints, and fasteners to ensure they are intact. Identifying loose panels or damaged vents early prevents water from seeping behind the siding, which could cause hidden rot or mold growth.
Test the cleaning solution on a small inconspicuous section
Never apply a cleaning agent to the entire house without testing it first. Choose a small, hidden area to verify how the solution reacts with your specific siding material. This simple step is a cornerstone of safe DIY siding cleaning and helps you avoid widespread aesthetic issues.
Check for color transfer, surface softness, streaking, or coating damage
After the test area dries, inspect it carefully for any signs of trouble. Look for color transfer on your cloth, which indicates the finish is breaking down. If you notice surface softness, streaking, or uneven patches, stop immediately and adjust your cleaning approach.
Remove outdoor furniture and shield plants before cleaning
Clear the perimeter of your home by moving outdoor furniture and decor to a safe location. We also suggest using plastic sheeting to shield delicate plants and landscaping from chemical runoff. If you encounter complex issues or feel overwhelmed by the process, our team is ready to assist you at (571) 426-8643.
Step One: Rinse Away Loose Dirt Before Treating Oxidation
Proper preparation begins with a gentle rinse to remove surface-level contaminants. Before you apply any chemical treatments, you must ensure the surface is free of loose particles that could interfere with the process. This initial phase of exterior siding cleaning is vital for achieving a uniform and professional result.
Start at the top and work downward with low-pressure water
We always recommend starting at the highest point of your siding and working your way down toward the ground. Using a standard garden hose with a low-pressure nozzle allows you to rinse away dust and grime effectively. Gravity is your best friend during this stage, as it helps carry the loosened debris away from the areas you have already cleaned.
Loosen cobwebs, dust, pollen, and surface debris with a soft brush
Sometimes, a simple rinse is not enough to dislodge stubborn cobwebs or thick layers of pollen. In these cases, we suggest using a soft-bristled brush to gently agitate the surface. This manual step ensures that your exterior siding cleaning efforts are not wasted on dirt that could have been easily wiped away.
Avoid forcing water behind siding panels, windows, and electrical fixtures
You must exercise caution to avoid spraying water directly into sensitive areas. Forcing water behind siding panels or into window frames can lead to moisture buildup and potential structural damage. Always aim your hose at a downward angle to keep water away from electrical fixtures and vents, ensuring a safe and effective process.
Why high-pressure washing can worsen oxidation and damage siding
Many homeowners mistakenly believe that high-pressure washing is the fastest way to restore their home. However, aggressive pressure can actually drive oxidation deeper into the material or strip away protective finishes entirely. If you find that your siding requires more than a gentle rinse, please reach out to our team at (571) 426-8643 for expert guidance on how to proceed without causing harm.
Step Two: Apply a Siding-Safe Oxidation Removal Solution
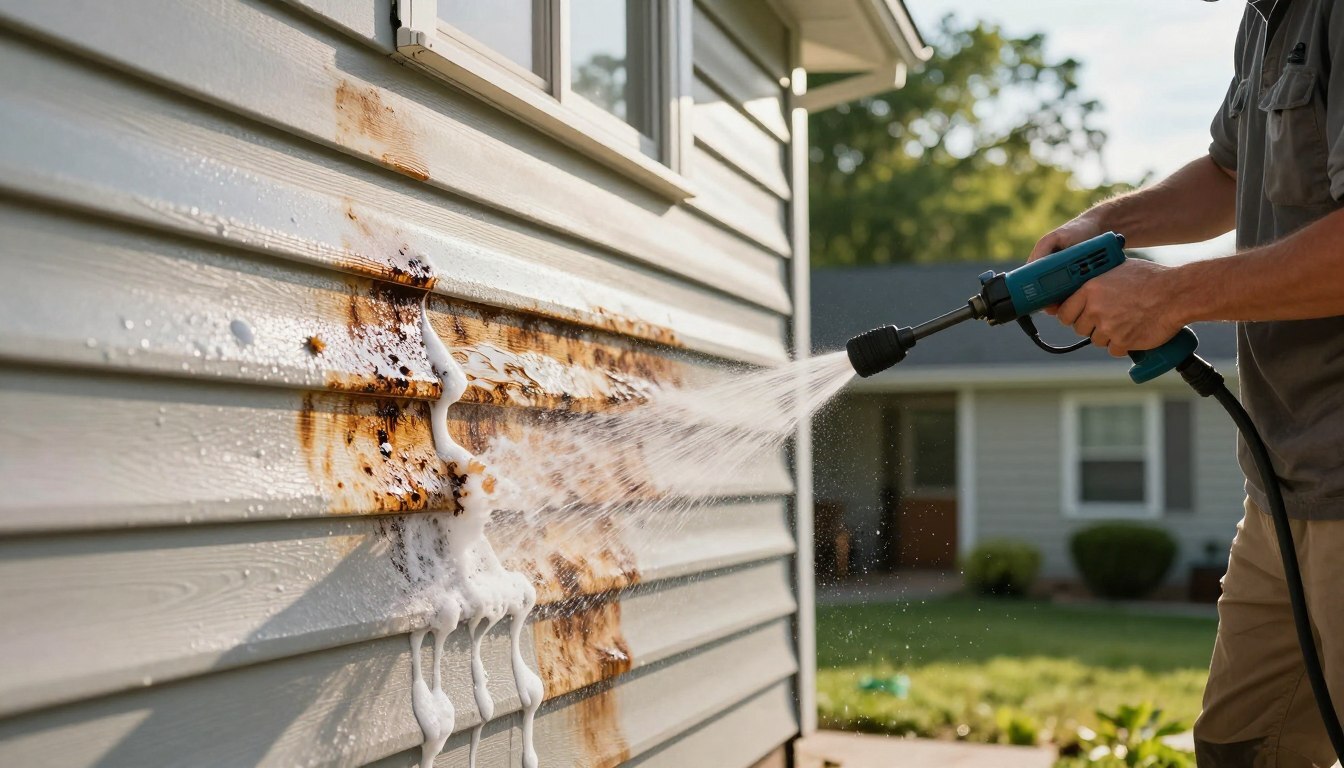
Once the surface is free of loose debris, we move to the most critical phase of the process. Applying a specialized cleaner is essential for both immediate aesthetic restoration and long-term oxidation prevention. By using the right formula, you ensure that your siding remains protected against future environmental damage.
Follow the product label for dilution, dwell time, and application method
Always read the manufacturer’s instructions before you begin. Proper dilution ratios are vital to ensure the product is effective without being overly aggressive. Respecting the recommended dwell time allows the solution to break down chalky buildup without harming the underlying material.
Work in manageable sections to prevent cleaner from drying on the surface
We suggest working in small, controlled areas to maintain consistency. If a cleaning solution dries on the siding, it can leave unsightly streaks or residue that are difficult to remove later. Keeping the surface damp with the product ensures a uniform finish across your entire home.
Apply the solution evenly to chalky and discolored areas
Focus your efforts on the most heavily affected spots where chalky residue is most visible. Using a consistent application technique helps achieve a balanced look. This careful approach is a key part of successful oxidation removal, ensuring that no patches are left untreated.
Use extra care around painted aluminum and older siding finishes
Older surfaces and painted aluminum require a gentler touch to avoid stripping the finish. We recommend testing a small, hidden area first to see how the material reacts. If you feel uncertain about the process, our team is available at (571) 426-8643 to provide professional guidance.
Never mix bleach, acids, ammonia, or other household cleaners
Safety is our top priority when handling chemical solutions. Mixing different cleaning agents can create dangerous fumes or cause permanent damage to your siding. Please adhere to these safety standards:
- Never combine bleach with ammonia or acidic cleaners.
- Use only products specifically formulated for siding oxidation removal.
- Store all chemicals in their original containers to avoid accidental mixing.
- Ensure proper ventilation while working near windows and doors.
Step Three: Agitate the Surface Without Removing the Finish
Gentle agitation is the secret to successful oxidation removal without harming your home's exterior finish. By working the cleaning solution into the surface, we can effectively lift away the chalky residue that dulls your siding's appearance. If you encounter stubborn areas that require professional expertise, please feel free to contact us at (571) 426-8643 for assistance.
Scrub gently with a soft-bristled brush or nonabrasive cleaning pad
We always recommend using a soft-bristled brush or a high-quality nonabrasive cleaning pad. These tools are designed to lift debris without scratching or dulling the underlying material. Avoid using steel wool or stiff wire brushes, as these will permanently damage the siding surface.
Follow the direction of siding panels, grooves, and texture
Consistency is key when cleaning your home. Always scrub in the same direction as the siding panels or grooves to ensure an even finish. This technique helps maintain the structural integrity of the material while providing a uniform look across the entire wall.
Use repeated light passes instead of aggressive pressure
It is tempting to scrub harder to remove oxidation quickly, but this often leads to uneven results. Instead, we suggest using repeated light passes to gently lift the buildup. This controlled approach is much safer for your siding than applying heavy, aggressive pressure.
Rinse the brush frequently to avoid spreading loosened oxidation
As you work, the brush will naturally collect the chalky residue you are trying to remove. Rinse your brush in a clean bucket of water frequently to prevent spreading this grime back onto the siding. This simple habit ensures that your oxidation removal process remains efficient and effective.
Stop immediately if the finish flakes, transfers, or becomes uneven
Pay close attention to how the siding reacts during the cleaning process. If you notice the finish beginning to flake, transfer onto your brush, or show signs of unevenness, you must stop immediately. Continuing to scrub in these conditions may cause permanent damage that cannot be easily repaired.
Step Four: Rinse, Inspect, and Repeat Carefully
We recommend a systematic approach to rinsing and inspecting your home exterior to ensure total success. Proper rinsing is the most critical step to ensure your efforts in oxidation removal yield the best results.
Thorough rinsing for a clean finish
You must rinse each section thoroughly before moving to the next area of your home. Use a gentle stream of water to wash away all cleaning agents and loosened debris. Leaving residue behind can cause streaking or attract new dirt quickly.
Evaluating results after the surface dries
It is vital to inspect the siding after it dries rather than judging it while wet. Water often masks imperfections, making faded areas appear uniform temporarily. Once the surface is dry, you can accurately assess if you have succeeded in restoring siding shine.
Deciding when to repeat the treatment
Only repeat the cleaning process if the siding remains structurally sound. If the material is brittle or shows signs of deep cracking, further cleaning may cause more harm than good. We advise caution to avoid damaging the integrity of your exterior panels.
Managing stubborn stains safely
If you encounter persistent stains, try to address them without over-scrubbing the surface. Aggressive scrubbing often removes the protective factory finish, which can lead to faster oxidation in the future. Gentle, repeated passes are always safer than intense pressure.
Identifying permanent finish degradation
Sometimes, you must recognize when oxidation has permanently changed the siding finish. If the color remains dull or uneven despite your best efforts, the material may have reached the end of its lifespan. If you are unsure about the condition of your home, please contact our experts at (571) 426-8643 for a professional assessment on restoring siding shine.
Step Five: Restore Uniform Shine and Address Remaining Surface Issues
Now that the chalky residue is removed, we focus on long-term protection and aesthetic consistency. Achieving a professional-grade finish requires more than just cleaning; it involves sealing the surface to maintain the results of your siding restoration efforts.
Use a manufacturer-approved siding protectant when appropriate
After the surface has dried completely, applying a high-quality, water-based protectant can be highly beneficial. We recommend products specifically designed with UV inhibitors to prevent future sun damage. This step is essential for restoring siding shine and ensuring the material remains resilient against the elements.
Avoid waxes, oily coatings, and products that trap dirt on siding
It is tempting to use household waxes to achieve a quick glow, but we strongly advise against this. Oily coatings often act as a magnet for dust, pollen, and grime, which will quickly dull your home's appearance. Instead, stick to specialized exterior treatments that provide a clean, dry finish without attracting unwanted debris.
Blend cleaned sections carefully to reduce visible transition lines
When working in stages, you may notice slight differences in appearance between treated and untreated areas. We suggest overlapping your application slightly to ensure a seamless look across the entire wall. Careful blending is a hallmark of effective shine restoration and keeps your home looking uniform.
Consider panel replacement or repainting for severe finish loss
Sometimes, oxidation has caused permanent damage that cleaning cannot fix. If the material remains discolored or brittle after treatment, it may be time to consider professional siding restoration through repainting or panel replacement. If you are unsure about the condition of your exterior, please reach out to our team at (571) 426-8643 for an expert assessment.
Common Oxidation Removal Mistakes That Damage Siding
We often see well-intentioned DIY projects turn into expensive repairs due to simple mistakes. Proper siding maintenance requires a careful approach to ensure you do not strip away the protective finish of your home. Before you begin, it is essential to learn how to prepare your home for professional cleaning to avoid these common pitfalls.
Using excessive pressure to remove chalking faster
Many people mistakenly believe that higher water pressure will remove oxidation more effectively. In reality, excessive pressure can force water behind panels, leading to mold growth or structural rot. It often strips the factory finish, leaving the material vulnerable to future damage.
Leaving cleaning chemicals on siding too long
Chemical dwell time is critical for safe siding maintenance. If you leave cleaning solutions on the surface for too long, they can etch the material or cause permanent streaking. Always follow the manufacturer's recommended timing to protect your investment.
Cleaning in direct sunlight or extreme temperatures
Working under the hot sun causes cleaning agents to dry prematurely. This creates uneven patches and stubborn residue that is difficult to rinse away. We recommend cleaning during cooler parts of the day to ensure the solution works evenly across the entire surface.
Ignoring manufacturer instructions and material-specific limitations
Every siding material, from vinyl to painted aluminum, has unique requirements. Ignoring these guidelines can lead to irreversible surface degradation. Always check the documentation provided by your siding manufacturer before applying any chemical treatments.
Expecting cleaning to repair warped, cracked, or brittle panels
It is important to understand that cleaning is not a repair process. If your panels are already warped, cracked, or brittle, no amount of scrubbing will restore their structural integrity. In these cases, professional replacement is the only viable solution for your siding maintenance needs.
| Common Mistake | Potential Consequence | Best Practice |
|---|---|---|
| High-Pressure Spray | Surface gouging and water intrusion | Use low-pressure rinsing |
| Extended Dwell Time | Chemical etching and streaks | Follow label instructions |
| Direct Sunlight | Uneven cleaning and residue | Work in the shade |
| Ignoring Manuals | Permanent material damage | Consult manufacturer guides |
If you are unsure about the condition of your exterior or need expert assistance in Northern Virginia, please reach out to our team at (571) 426-8643. We are here to help you maintain your home's beauty safely and effectively.
How to Prevent Oxidation and Maintain Siding Shine
We believe that a consistent care routine is the secret to long-lasting siding beauty. By taking small, proactive steps, you can significantly delay the onset of chalky buildup and keep your home looking fresh for years to come.
Schedule routine exterior siding cleaning and visual inspections
Regular exterior siding cleaning is the most effective way to remove environmental pollutants before they bond with the finish. We recommend washing your home at least twice a year in humid or pollen-heavy regions, while an annual cleaning often suffices in drier climates.
"Maintenance is not just about aesthetics; it is the primary defense against the slow degradation of your home's protective exterior layers."
Keep gutters, downspouts, sprinklers, and roof runoff away from siding
Water is a primary catalyst for surface damage. Ensure your gutters and downspouts are clear so that water is directed away from the walls rather than cascading down them. Additionally, adjust your lawn sprinklers to avoid direct contact with the siding, as mineral deposits and constant moisture accelerate oxidation prevention challenges.
Trim vegetation to improve airflow and reduce prolonged moisture
Overgrown bushes and tree branches trap humidity against your home, creating a breeding ground for algae and surface decay. We suggest keeping all vegetation trimmed at least two feet away from the structure. This simple act of siding maintenance improves airflow and allows the siding to dry quickly after rain.
Repair damaged caulk, loose panels, and leaking exterior fixtures promptly
Small gaps in your siding allow moisture to seep behind the panels, which can lead to hidden rot. Inspect your home for cracked caulk or loose fasteners during every seasonal change. If you notice a leaking exterior light or faucet, address it immediately to prevent long-term staining.
Plan seasonal maintenance to protect siding from sun and weather exposure
Developing a structured plan helps you stay ahead of the elements. By combining routine inspections with UV-protective treatments, you preserve the integrity of the finish. If you need professional guidance or help with a complex repair, feel free to contact our team at (571) 426-8643.
| Task | Frequency | Goal |
|---|---|---|
| Surface Wash | Bi-Annually | Remove Pollutants |
| Gutter Check | Quarterly | Prevent Runoff |
| Caulk Inspection | Annually | Seal Gaps |
| Vegetation Trim | Bi-Annually | Improve Airflow |
When to Call Us for Professional Siding Restoration
While many homeowners enjoy tackling exterior maintenance, certain conditions require the steady hand of an expert. Attempting oxidation removal on your own can sometimes lead to unintended damage if the material is fragile or the finish is already compromised. We provide the specialized care needed to restore your home's curb appeal safely and effectively.
Signs that oxidation requires professional assessment or treatment
You should consider reaching out to our team if you notice heavy chalking that does not respond to gentle cleaning. If you see signs of finish transfer, where the color rubs off onto your hands or cloth, the protective layer of your siding may be permanently degraded. Furthermore, if your panels appear brittle, warped, or show deep, uneven discoloration, professional intervention is necessary to prevent further structural deterioration.
"Proper maintenance is the difference between a home that ages gracefully and one that requires costly, premature replacement."
How our team can protect the siding while improving its appearance
Our experts utilize industry-standard techniques to ensure your property remains protected throughout the entire siding restoration process. We take great care to shield your landscaping, windows, and delicate trim from harsh cleaning agents. By selecting the right chemical balance for your specific siding material, we minimize the risk of etching or streaking.
| Condition | DIY Suitability | Professional Recommendation |
|---|---|---|
| Light surface dust | High | Not required |
| Moderate chalking | Moderate | Optional |
| Severe finish loss | Low | Highly recommended |
| Brittle or cracked panels | None | Required |
Learning how to remove oxidation from siding to restore its shine can be complex. If you want to ensure the job is done right the first time, our team across Fairfax, Loudoun, Arlington, and Alexandria is here to help.
Call (571) 426-8643 to ScheduleConclusion
Revitalizing your home requires a clear understanding of how oxidation differs from standard surface dirt. Relying on pressure washing alone often fails to address the chalky buildup that dulls your curb appeal. We recommend a systematic approach involving careful rinsing, testing, and the application of specialized cleaning agents to achieve lasting results.
Learning how to remove oxidation from siding to restore its shine is a rewarding project for any homeowner. Gentle agitation and thorough rinsing remain the most effective ways to protect your finish while removing unsightly discoloration. Proper maintenance prevents long-term damage and keeps your exterior looking fresh throughout the changing seasons.
Some situations involve severe finish loss or structural degradation that simple cleaning cannot fix. In these cases, professional siding restoration becomes the best path forward to ensure your home remains protected and visually appealing. Whether you need expert advice on paint touch-ups or full panel replacement, we provide the support necessary for successful shine restoration.
Our team is ready to assist you with restoring siding shine safely and efficiently. Reach out to us at (571) 426-8643 to discuss your specific needs. We look forward to helping you maintain the beauty and integrity of your property for years to come.
Frequently Asked Questions
How to remove oxidation from siding to restore its shine safely?
The safest method involves using a dedicated, non-bleach oxidation remover combined with a soft-bristled brush and low-pressure water. Avoid high-pressure washing, as it can damage the panels and force water into your home's structure. Always test a small area first to ensure the finish remains intact.
Is DIY siding cleaning as effective as professional services for heavy chalking?
While DIY siding cleaning works well for light surface dirt and minor oxidation, heavy chalking often requires professional-grade surfactants and specific dwell-time management. Professionals have the equipment to reach high areas safely and the expertise to handle delicate aluminum or aged vinyl without causing further damage.
What are the best products for oxidation removal on vinyl siding?
We recommend using zero-bleach and zero-VOC cleaners specifically formulated for siding restoration, such as Zep or Simple Green Oxy Solve. These products break the chemical bond of the chalky residue without stripping the underlying color or harming your landscaping.
Can I use bleach for shine restoration on my home's exterior?
No, we advise against using bleach for restoring siding shine. While bleach is excellent for killing mold and mildew, it can actually dry out vinyl and accelerate the oxidation process over time. It may also leave a dull, flat finish rather than the luster you desire.
How often should I perform siding maintenance to prevent oxidation?
For effective oxidation prevention, we recommend an exterior siding cleaning at least once a year. If you live in a climate with intense sun exposure or high humidity, semi-annual maintenance is ideal to remove pollutants and apply UV-protective treatments that preserve the shine.
Why does my siding still look dull after I washed it?
If your siding is still dull after washing, you are likely dealing with oxidation rather than just dirt. Standard soaps cannot remove the chemically bonded chalky film. You will need a specialized oxidation removal process that includes gentle agitation to lift the dead pigment and restore the surface.
Will oxidation removal repair warped or brittle siding panels?
Unfortunately, no. Oxidation removal is a surface treatment designed for shine restoration and cleaning. If your panels are warped, cracked, or brittle, this indicates structural failure of the material, and siding restoration will likely require panel replacement or repainting rather than just cleaning.